Having migrated from Oxygen a few years ago, there’s one missing element in Bricks: Template Priority. In this post, I will address how to assign Bricks Template to a specific page.
Let’s assign Page template in each page (for specific page) like the image below
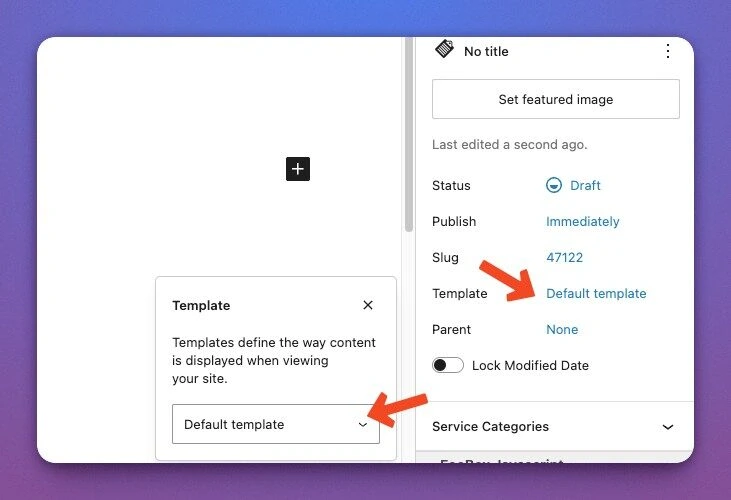
Before this, you have to use Template Condition in ______. Things get really messed up when you have multiple Custom Post Types (CPTs) and Taxonomy. A more straightforward way to assign a template is directly on the page.
Table of Contents – Bricks Template Assign to Page
Overview Steps
Here’s a quick overview steps that you need to do.
- Create a Bricks Template page
- Create a PHP template file in Bricks Child
- Paste the PHP Code
- Select on Page
- Preview
Create Your Bricks Template
Open Bricks → Template and start creating the template page. Make sure to select “Single”.

Start creating your page as desired.
You should also include the “Post Content” so that the page is rendered dynamically or using Gutenberg. If you are not using any, you should skip tutorial and use “Edit With Bricks” on the page itself.
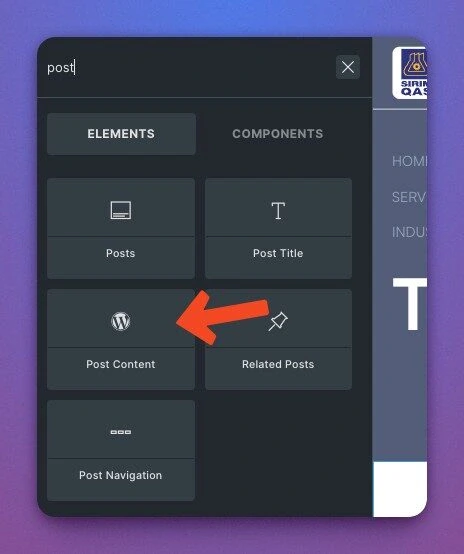
Once you are done, Save it and return to WP Dashboard.
It’s Just Not Selling
The PHP Bit (Easy)
Now we’re done with the template, we can move on the crucial part of PHP.
Open the Bricks Child Theme folder, and add a file with a name convention like “<your template name>-template.php”. Theoretically, you can name it however you want, but for the sake of your future sanity, save it with the same name as your Bricks Template page.
I have saved mine this way.
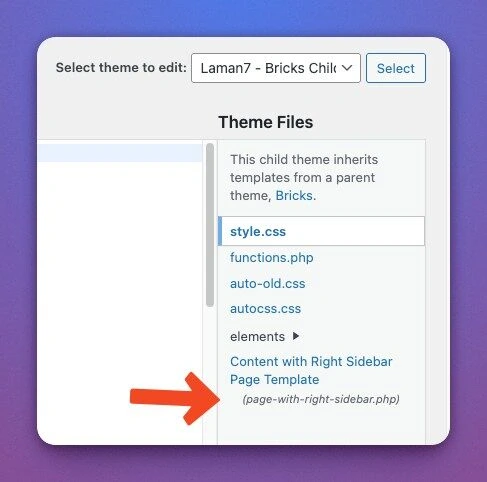
Paste the following PHP in the file you’ve created.
<?php
/*
  Template Name: Content Pages//Replace
  Template Post Type: service, page, industry
 */

get_header();

/* Replace "123", please refer your template ID */
echo '<main id="brx-content">' . do_shortcode( '[bricks_template id="123"]' ) . '</main>';

get_footer();
Change the bricks_template id="123“ to your template ID.
You can get the template ID from Bricks → Templates. Copy the ID and replace the numbers.
You can also assign the template to be used on any CPTS in the “Template Post Type” line. Be sure to use the right CPT name. Otherwise, it won’t appear.
Assign Your Page to Template
Now the easiest part is choosing the page to render the template.
Go to your Page or CPT and click “Edit”. You will see change template type on the right panel.

Write something on the Gutenberg or Classic editor save and preview.
Congrats! You Now Have a Custom Template
You can use this custom template for many applications like
- Using pages as specific service page
- Different page layout for your highlighted blog posts
- AB Testing for ads optimisation
- Using hte same the post type with multiple page layout
The choice is yours!
If you find this post helpful, please share it with your Bricks friend and community.


